- Serverless Framework
-
AWS Serverless Application Model
- Deploying AWS Lambda function using AWS SAM and GitLab CI/CD
- Example
- Steps
- Installing SAM CLI
- Creating an AWS SAM application using SAM CLI
- Setting up your AWS credentials with your GitLab account
- Crafting the
.gitlab-ci.ymlfile - Deploying your application
- Testing the deployed application
- Testing Locally
Deploying AWS Lambda function using GitLab CI/CD
GitLab allows users to easily deploy AWS Lambda functions and create rich serverless applications.
GitLab supports deployment of AWS Lambda functions through GitLab CI/CD using the following Serverless frameworks:
Serverless Framework
The Serverless Framework can deploy to AWS.
We have prepared an example with a step-by-step guide to create a simple function and deploy it on AWS.
Additionally, in the How To section, you can read about different use cases like:
- Running a function locally.
- Working with secrets.
- Setting up CORS.
Alternatively, you can quickly create a new project with a template. The Serverless Framework/JS template already includes all parts described below.
Example
This example shows you how to:
- Create a basic AWS Lambda Node.js function.
- Link the function to an API Gateway
GETendpoint.
Steps
The example consists of the following steps:
- Creating a Lambda handler function.
- Creating a
serverless.ymlfile. - Crafting the
.gitlab-ci.ymlfile. - Setting up your AWS credentials with your GitLab account.
- Deploying your function.
- Testing the deployed function.
Lets take it step by step.
Creating a Lambda handler function
Your Lambda function is the primary handler of requests. In this case, create a very simple Node.js hello function:
'use strict';

module.exports.hello = async event => {
  return {
    statusCode: 200,
    body: JSON.stringify(
      {
        message: 'Your function executed successfully!'
      },
      null,
      2
    ),
  };
};
Place this code in the file src/handler.js.
src is the standard location for serverless functions, but is customizable should you desire that.
In our case, module.exports.hello defines the hello handler to reference later in the serverless.yml.
You can learn more about the AWS Lambda Node.js function handler and all its various options in its documentation.
Creating a serverless.yml file
In the root of your project, create a serverless.yml file containing configuration specifics for the Serverless Framework.
Put the following code in the file:
service: gitlab-example
provider:
  name: aws
  runtime: nodejs14.x

functions:
  hello:
    handler: src/handler.hello
    events:
      - http: GET hello
Our function contains a handler and a event.
The handler definition provisions the Lambda function using the source code located src/handler.hello.
The events declaration creates an AWS API Gateway GET endpoint to receive external requests and hand them over to the Lambda function via a service integration.
You can read more about the available properties and additional configuration possibilities of the Serverless Framework.
Crafting the .gitlab-ci.yml file
In a .gitlab-ci.yml file in the root of your project, place the following code:
image: node:latest

stages:
  - deploy

production:
  stage: deploy
  before_script:
    - npm config set prefix /usr/local
    - npm install -g serverless
  script:
    - serverless deploy --stage production --verbose
  environment: production
This example code does the following:
- Uses the
node:latestimage for all GitLab CI/CD builds - The
deploystage:- Installs the Serverless Framework.
- Deploys the serverless function to your AWS account using the AWS credentials defined above.
Setting up your AWS credentials with your GitLab account
In order to interact with your AWS account, the GitLab CI/CD pipelines require both AWS_ACCESS_KEY_ID and AWS_SECRET_ACCESS_KEY to be defined in your GitLab settings under Settings > CI/CD > Variables.
For more information please see Create a custom variable in the UI.
The AWS credentials you provide must include IAM policies that provision correct access control to AWS Lambda, API Gateway, CloudFormation, and IAM resources.
Deploying your function
git push the changes to your GitLab repository and the GitLab build pipeline deploys your function.
Your GitLab deploy stage log contains output containing your AWS Lambda endpoint URL, with log lines similar to this:
endpoints:
  GET - https://u768nzby1j.execute-api.us-east-1.amazonaws.com/production/hello
Manually testing your function
Running the following curl command should trigger your function.
Your URL should be the one retrieved from the GitLab deploy stage log:
curl "https://u768nzby1j.execute-api.us-east-1.amazonaws.com/production/hello"
That should output:
{
  "message": "Your function executed successfully!"
}
Hooray! You now have a AWS Lambda function deployed via GitLab CI/CD.
Nice work!
How To
In this section, we show you how to build on the basic example to:
- Run the function locally.
- Set up secret variables.
- Set up CORS.
Running function locally
The serverless-offline plugin allows to run your code locally. To run your code locally:
-
Add the following to your
serverless.yml:plugins: - serverless-offline -
Start the service by running the following command:
serverless offline
Running the following curl command should trigger your function.
curl "http://localhost:3000/hello"
It should output:
{
  "message": "Your function executed successfully!"
}
Secret variables
Secrets are injected into your functions using environment variables.
By defining variables in the provider section of the serverless.yml, you add them to
the environment of the deployed function:
provider:
  # Other configuration omitted
  # ...
  environment:
    A_VARIABLE: ${env:A_VARIABLE}
From there, you can reference them in your functions as well.
Remember to add A_VARIABLE to your GitLab CI/CD variables under Settings > CI/CD > Variables to be picked up and deployed with your function.
Setting up CORS
If you want to set up a web page that makes calls to your function, like we have done in the template, you need to deal with the Cross-Origin Resource Sharing (CORS).
The quick way to do that is to add the cors: true flag to the HTTP endpoint in your serverless.yml:
functions:
  hello:
    handler: src/handler.hello
    events:
      - http:  # Rewrite this part to enable CORS
          path: hello
          method: get
          cors: true  # <-- CORS here
You also need to return CORS specific headers in your function response:
'use strict';

module.exports.hello = async event => {
  return {
    statusCode: 200,
    headers: {
      // Uncomment the line below if you need access to cookies or authentication
      // 'Access-Control-Allow-Credentials': true,
      'Access-Control-Allow-Origin': '*'
    },
    body: JSON.stringify(
      {
        message: 'Your function executed successfully!'
      },
      null,
      2
    ),
  };
};
For more information, see the Your CORS and API Gateway survival guide blog post written by the Serverless Framework team.
Writing automated tests
The Serverless Framework
example project shows how to use Jest, Axios, and serverless-offline plugin to do
automated testing of both local and deployed serverless function.
Examples and template
The example code is available:
- As a clonable repository.
- In a version with tests and secret variables.
You can also use a template
(based on the version with tests and secret variables) from within the GitLab UI (see
the Serverless Framework/JS template).
AWS Serverless Application Model
AWS Serverless Application Model is an open source framework for building serverless applications. It makes it easier to build and deploy serverless applications. For more details, please take a look at AWS documentation on AWS Serverless Application Model.
Deploying AWS Lambda function using AWS SAM and GitLab CI/CD
GitLab allows developers to build and deploy serverless applications using the combination of:
- AWS Serverless Application Model (AWS SAM).
- GitLab CI/CD.
Example
This example shows you how to:
- Install SAM CLI.
- Create a sample SAM application including a Lambda function and API Gateway.
- Build and deploy the application to your AWS account using GitLab CI/CD.
Steps
The example consists of the following steps:
- Installing SAM CLI.
- Creating an AWS SAM application using SAM CLI.
- Crafting the
.gitlab-ci.ymlfile. - Setting up your AWS credentials with your GitLab account.
- Deploying your application.
- Testing the deployed function.
Installing SAM CLI
AWS SAM provides a CLI called AWS SAM CLI to make it easier to create and manage applications.
Some steps in this documentation use SAM CLI. Follow the instructions for installing SAM CLI to install and configure SAM CLI.
If you use AWS Cloud9 as your integrated development environment (IDE), the following are installed for you:
- AWS Command Line Interface
- SAM CLI
- Docker and necessary Docker images.
Creating an AWS SAM application using SAM CLI
To create a new AWS SAM application:
- Create a new GitLab project.
-
git clonethe project into your local environment. -
Change to the newly cloned project and create a new SAM app using the following command:
sam init -r python3.8 -n gitlabpoc --app-template "hello-world" -
git pushthe application back to the GitLab project.
This creates a SAM app named gitlabpoc using the default configuration, a single
Python 3.8 function invoked by an Amazon API Gateway
endpoint. To see additional runtimes supported by SAM and options for sam init, run:
sam init -h
Setting up your AWS credentials with your GitLab account
In order to interact with your AWS account, the GitLab CI/CD pipelines require both
AWS_ACCESS_KEY_ID and AWS_SECRET_ACCESS_KEY to be set in the project’s CI/CD variables.
To set these:
- Navigate to the project’s Settings > CI/CD.
- Expand the Variables section and create entries for
AWS_ACCESS_KEY_IDandAWS_SECRET_ACCESS_KEY. - Mask the credentials so they do not show in logs using the Masked toggle.
The AWS credentials you provide must include IAM policies that provision correct access control to AWS Lambda, API Gateway, CloudFormation, and IAM resources.
Crafting the .gitlab-ci.yml file
In a .gitlab-ci.yml file in the root of your project,
add the following and replace <S3_bucket_name> with the name of the S3 bucket where you
want to store your package:
image: python:latest

stages:
  - deploy

production:
  stage: deploy
  before_script:
    - pip3 install awscli --upgrade
    - pip3 install aws-sam-cli --upgrade
  script:
    - sam build
    - sam package --output-template-file packaged.yaml --s3-bucket <S3_bucket_name>
    - sam deploy --template-file packaged.yaml --stack-name gitlabpoc  --s3-bucket <S3_bucket_name> --capabilities CAPABILITY_IAM --region us-east-1
  environment: production
Let’s examine the configuration file more closely:
-
imagespecifies the Docker image to use for this build. This is the latest Python image since the sample application is written in Python. - AWS CLI and AWS SAM CLI are installed in the
before_scriptsection. - SAM build, package, and deploy commands are used to build, package, and deploy the application.
Deploying your application
Push changes to your GitLab repository and the GitLab build pipeline deploys your application. If your:
- Build and deploy are successful, test your deployed application.
-
Build fails, look at the build log to see why the build failed. Some common reasons the build might fail are:
- Incompatible versions of software. For example, Python runtime version might be different from the Python on the build machine. Address this by installing the required versions of the software.
- You may not be able to access your AWS account from GitLab. Check the CI/CD variables you set up with AWS credentials.
- You may not have permission to deploy a serverless application. Make sure you provide all required permissions to deploy a serverless application.
Testing the deployed application
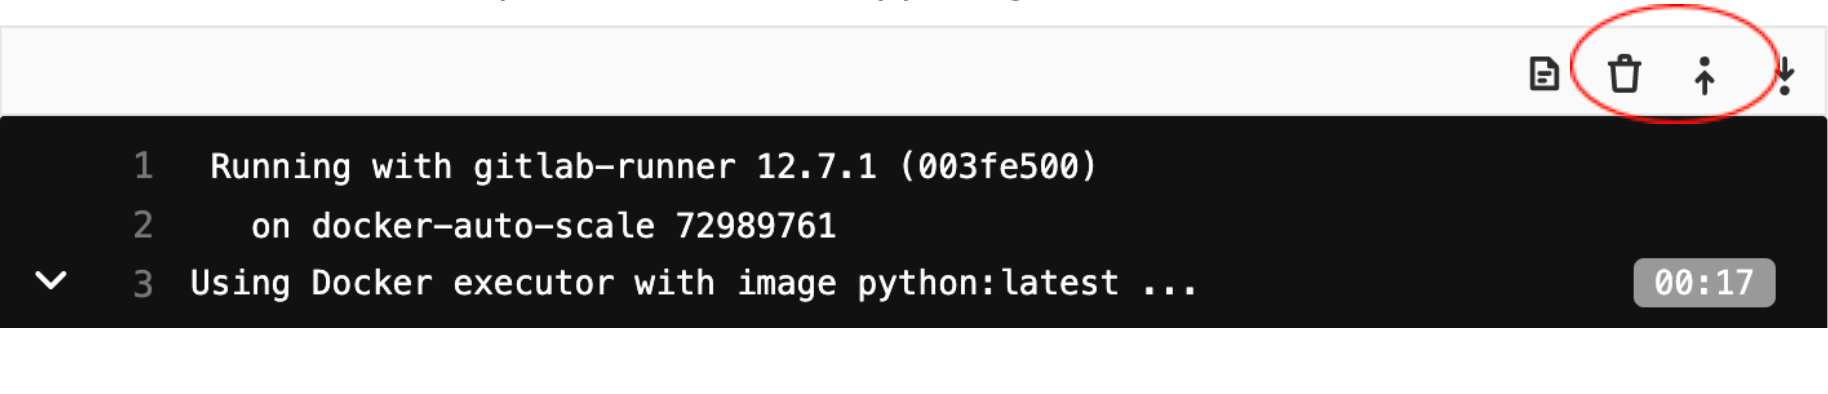
To test the application you deployed, please go to the build log and follow the following steps:
-
Click on “Show complete raw” on the upper right-hand corner:
-
Look for HelloWorldApi – API Gateway endpoint similar to shown below:

-
Use curl to test the API. For example:
curl "https://py4rg7qtlg.execute-api.us-east-1.amazonaws.com/Prod/hello/"
Output should be:
{"message": "hello world"}
Testing Locally
AWS SAM provides functionality to test your applications locally. You must have AWS SAM CLI installed locally for you to test locally.
First, test the function.
SAM provides a default event in events/event.json that includes a message body of:
{\"message\": \"hello world\"}
If you pass that event into the HelloWorldFunction, it should respond with the same
body.
Invoke the function by running:
sam local invoke HelloWorldFunction -e events/event.json
Output should be:
{"message": "hello world"}
After you confirm that Lambda function is working as expected, test the API Gateway using following steps.
Start the API locally by running:
sam local start-api
SAM again launches a Docker container, this time with a mocked Amazon API Gateway
listening on localhost:3000.
Call the hello API by running:
curl "http://127.0.0.1:3000/hello"
Output again should be:
{"message": "hello world"}